SimBrief and Navigraph Integration
Please use the Quick Links to jump to any relevant section. For connecting your SimBrief/Navigraph Accounts, click the button below.
Quick Links
| Quick Links |
|---|
| Flight Planning |
| SimBrief Airframe |
| Setup A32NX SimBrief Integration |
| Using flyPad SimBrief Integration |
| Using the FMS (MCDU) and SimBrief Integration |
Flight Planning
Check the Flight Planning guide for more details on Flight Planning in general.
In the world of flight simulation, SimBrief does all the flight planning for the users based on real word databases and sources. SimBrief provides on average ~40,000 flight plans to users each day and is the most commonly used tool for flight planning for non-professional flight simulation.
It is possible to use the SimBrief OFP (Operational Flight Plan) to configure and program the aircraft based on it without any special integration into the flight sim software or aircraft.
Flight Planning with SimBrief
This is best explained by SimBrief itself - SimBrief User Guide
SimBrief Airframe
SimBrief has a custom airframe available when using the A20N Aircraft type. You can select it as shown in the image below.

This airframe will be updated by FlyByWire Simulations when needed, so you will always have the right configuration available.
Setup A32NX SimBrief Integration
This integration does not require having an active Navigraph subscription.
Your Navigraph account needs to be configured in the flyPad EFB.
You can do this by navigating to the following page on the flyPad (EFB):
- Settings Page
- 3rd Party Options
- Select the "Link Account" button next to Navigraph Account Link
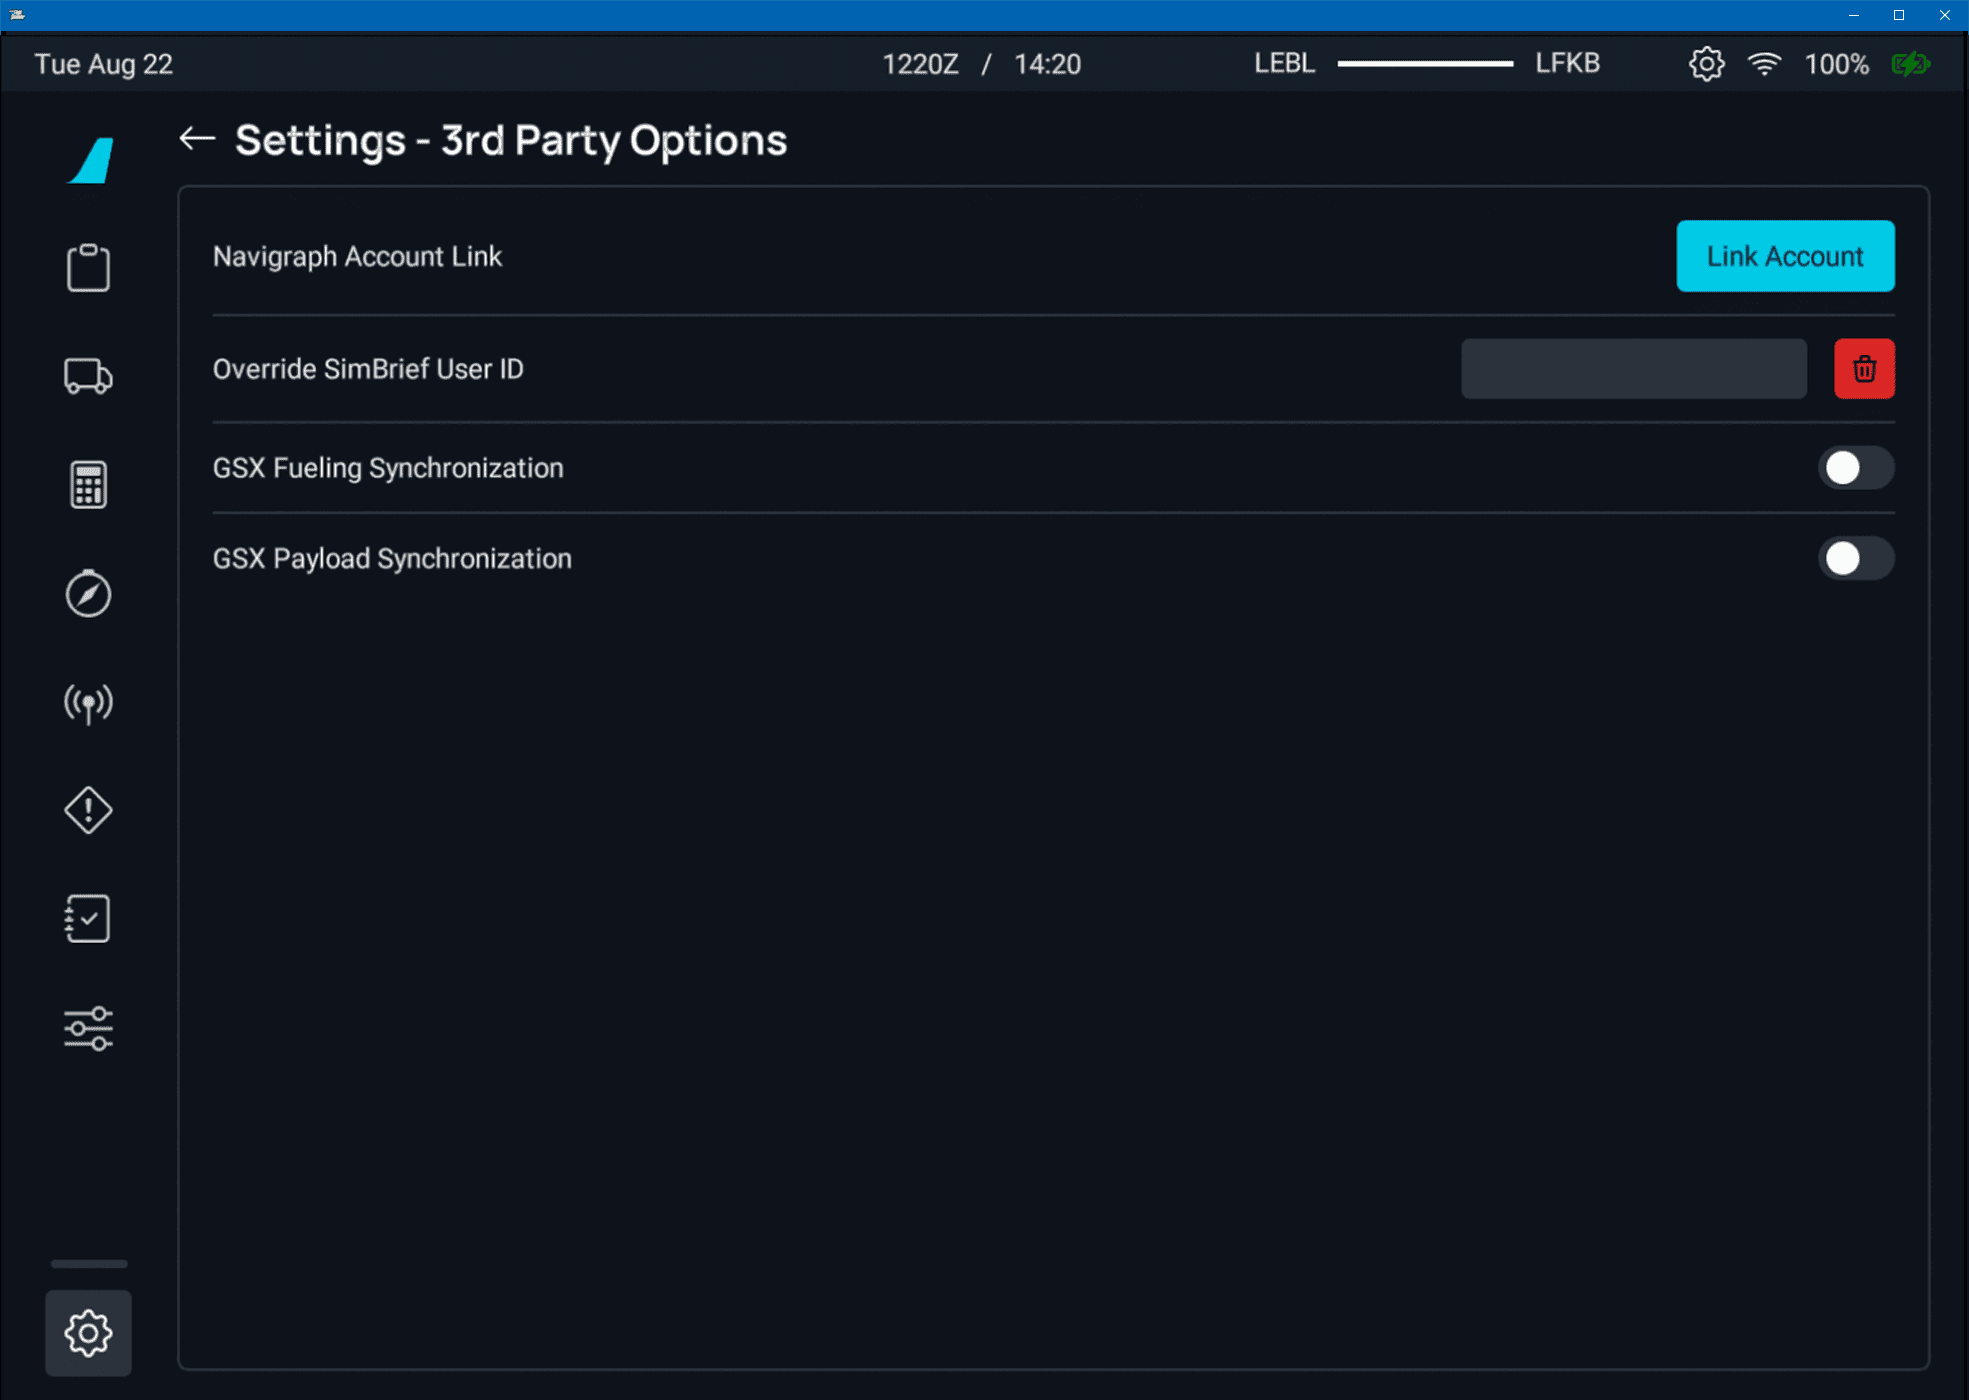
You will be presented with the following screen:
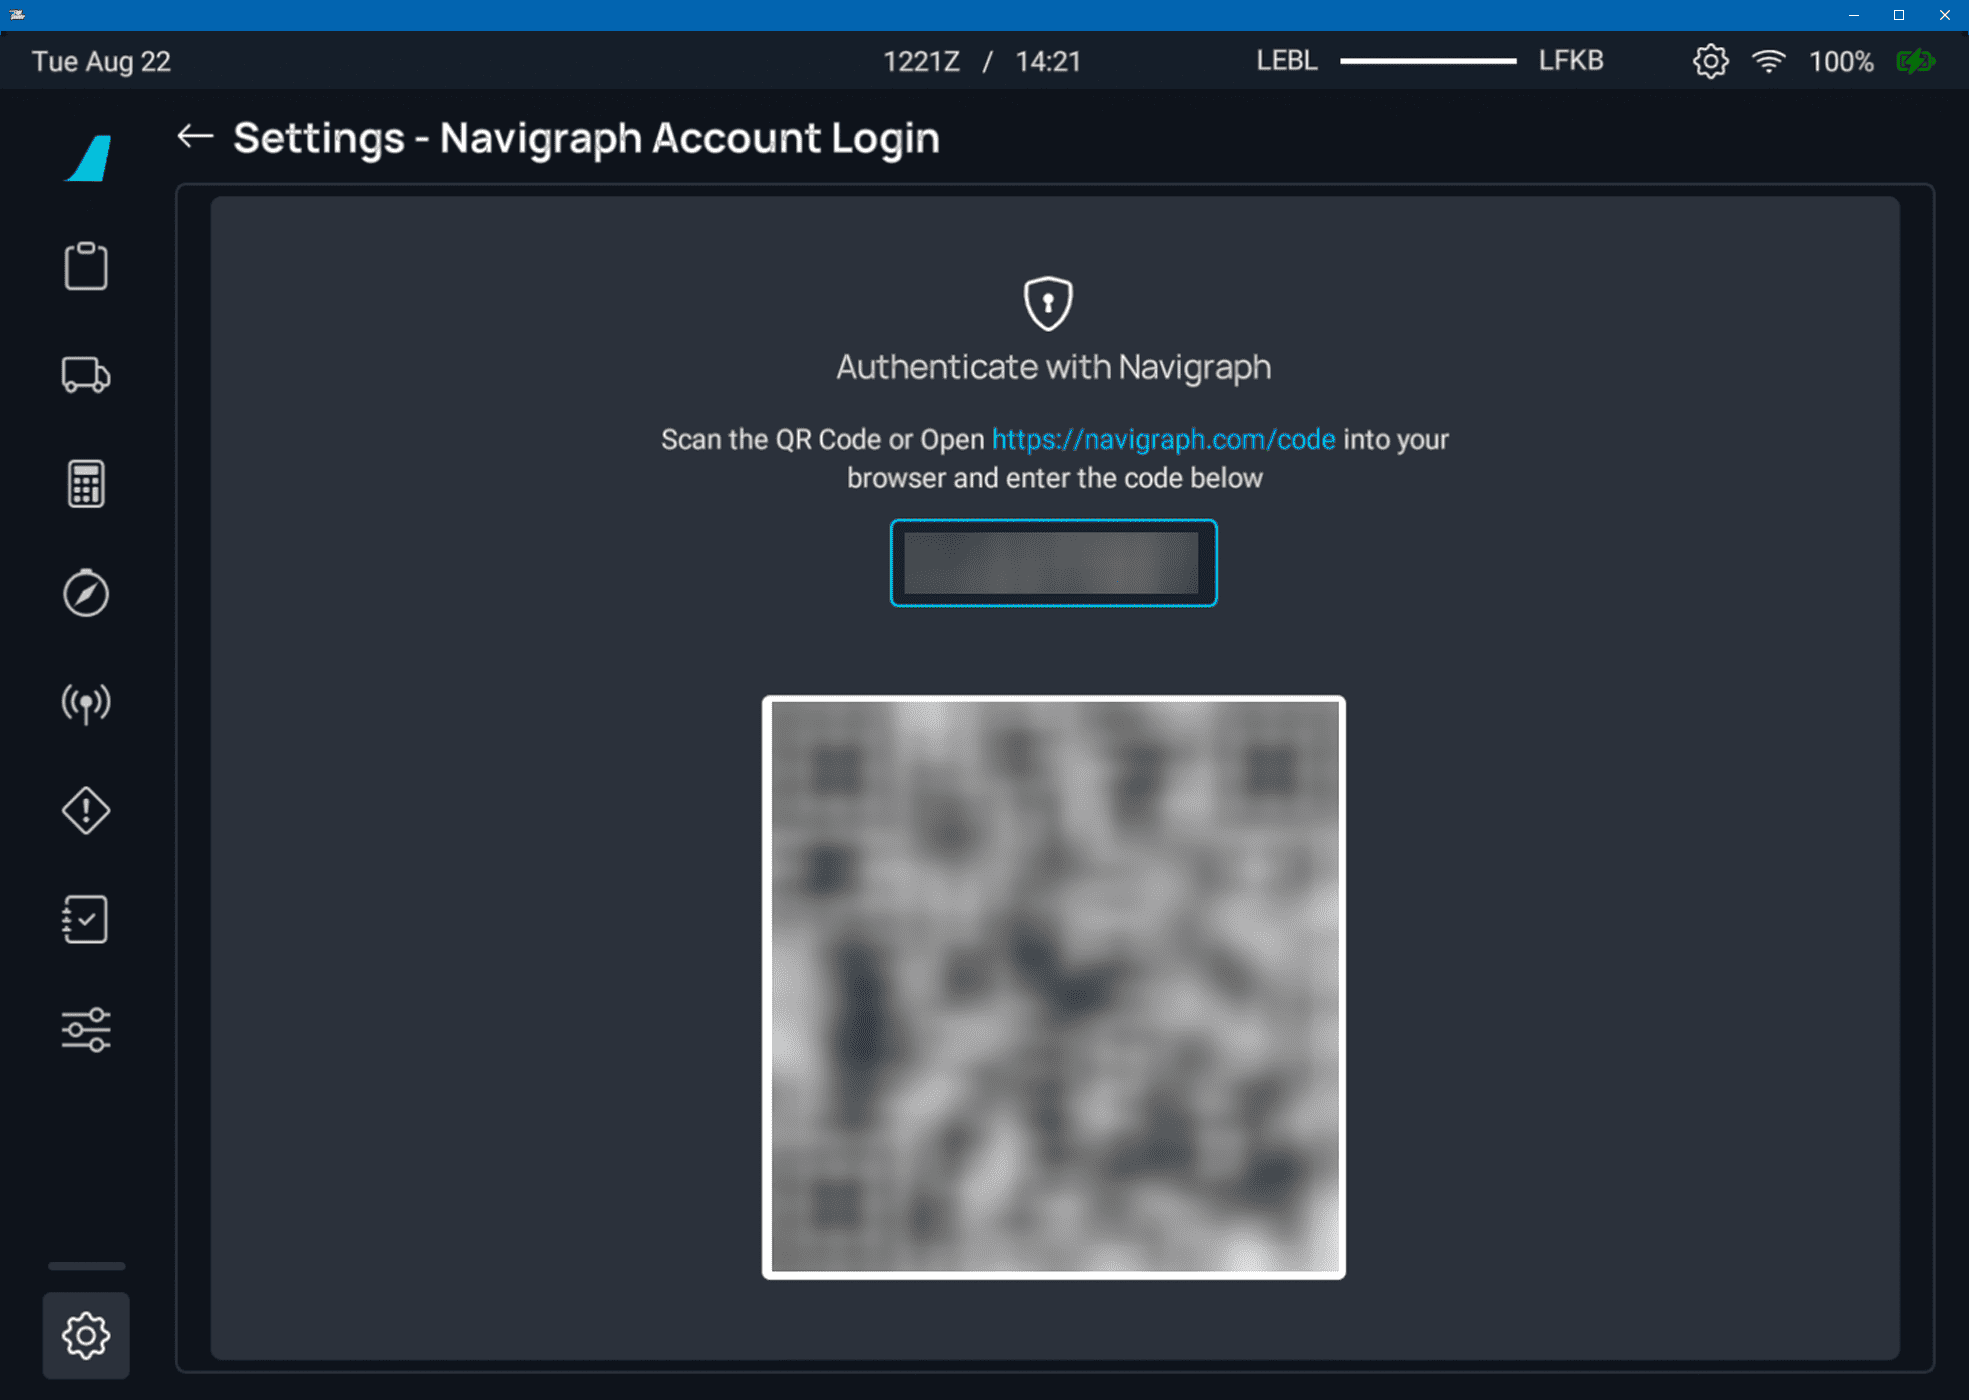
Follow the instructions above to link your account.
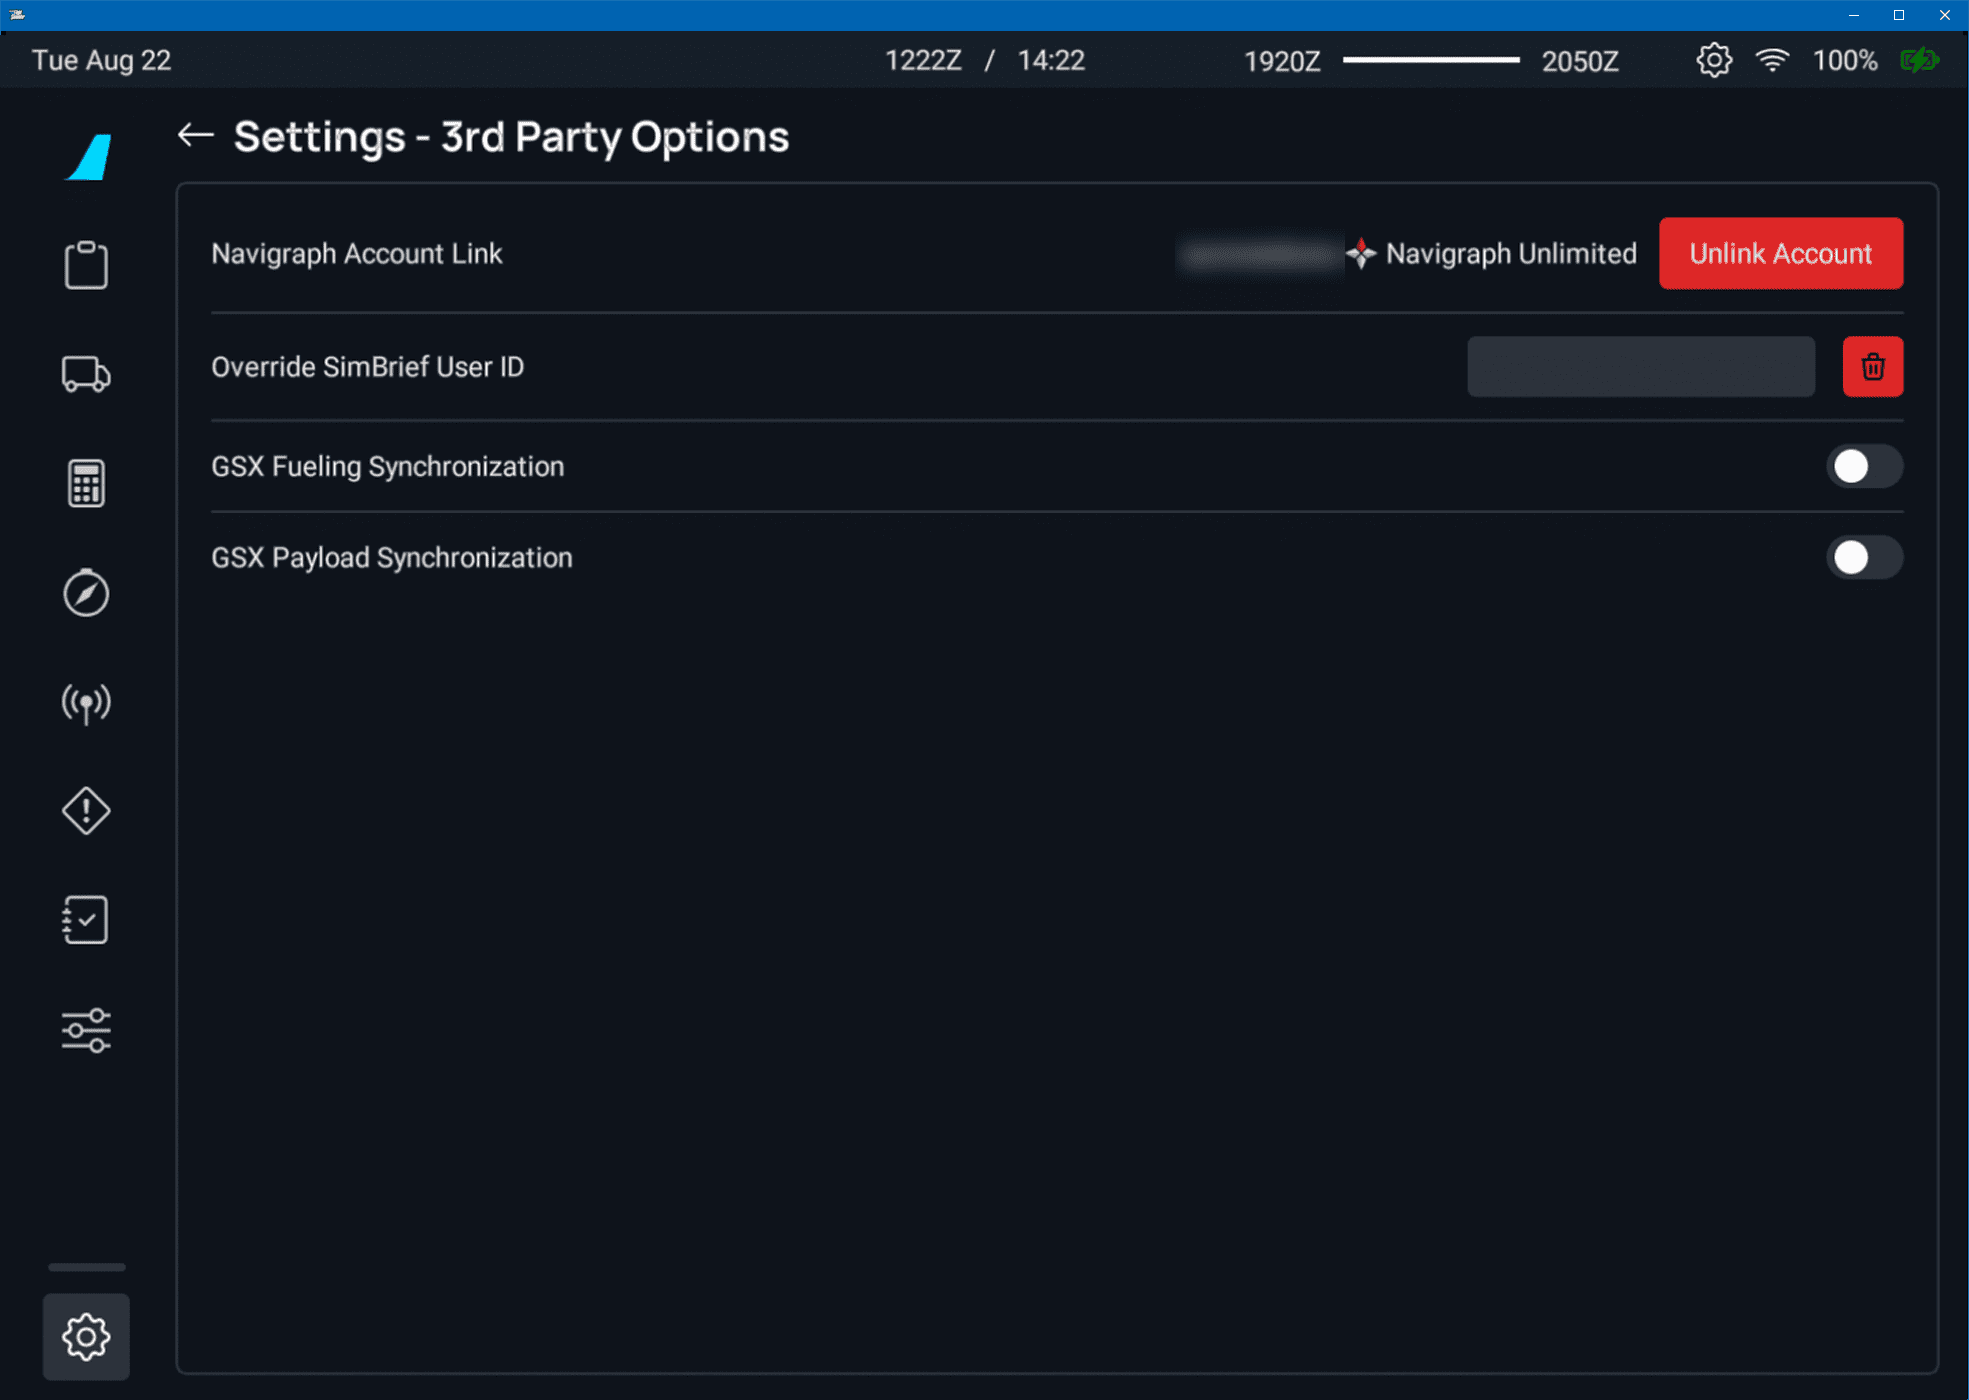
If successful, you should see your account name followed by your Navigraph account subscription status (not required) and an option to Unlink Account. As seen below:
Overriding SimBrief User ID
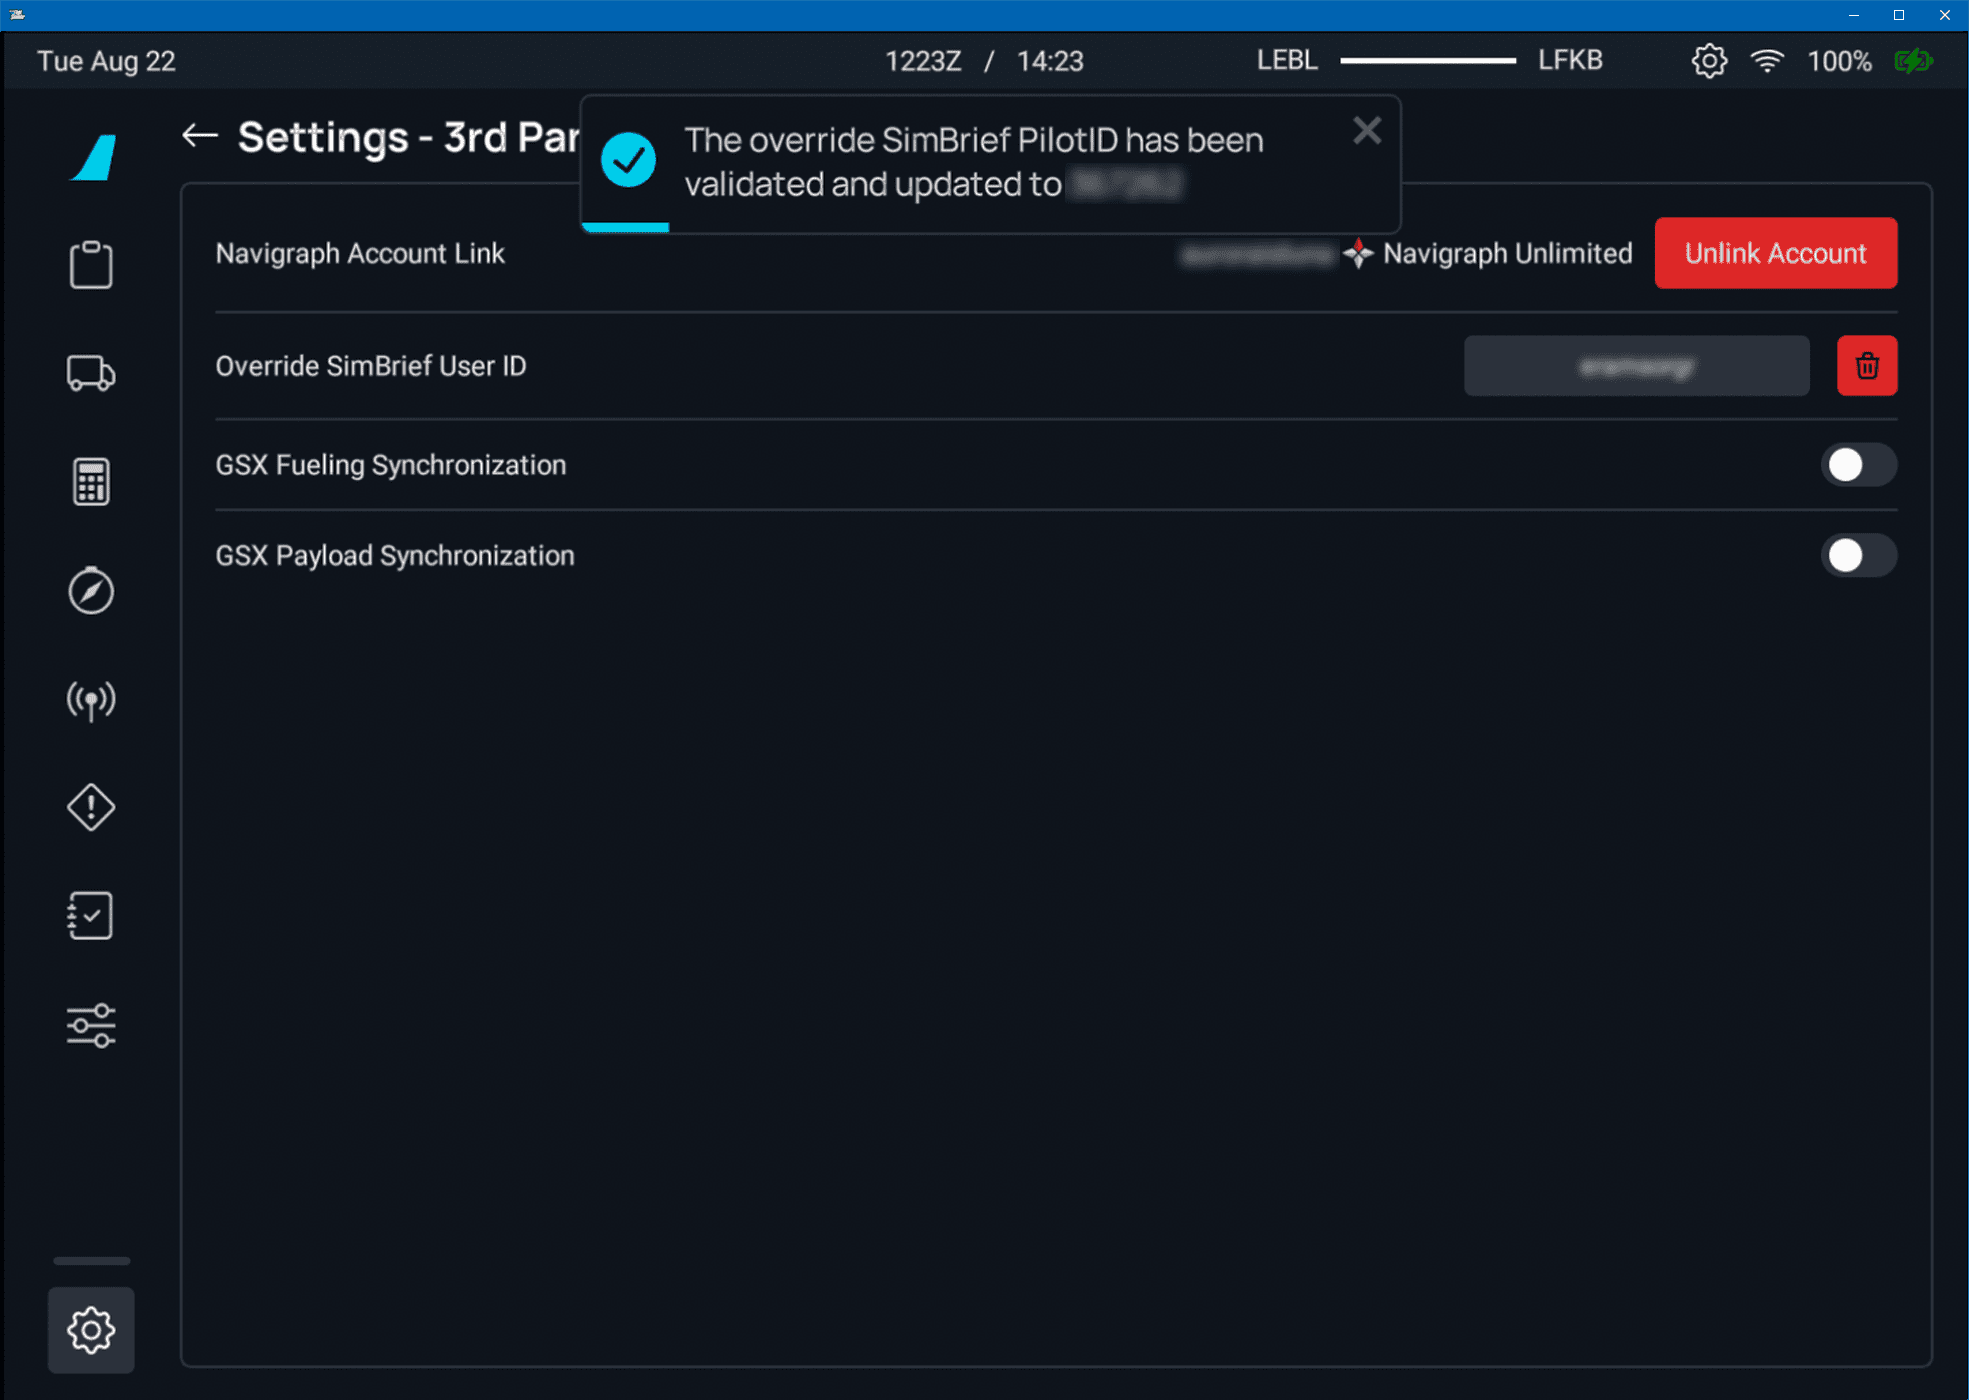
There may be situations where you would like to import data from SimBrief not specifically linked to your account, i.e., copying a streamer's or friend's flight plan to your aircraft or using an add-on for shared cockpit scenarios.
In this case you can override the SimBrief User ID by entering it in the SimBrief User ID field. This will override the linked Navigraph account temporarily until it is removed. You will be notified when the override is successful with a pop up message. Example below:
If you are still unsure of where the Settings page on the EFB is, please see flyPad Settings.
Using the flyPad SimBrief Integration
Importing the SimBrief OFP to the flyPad
See flyPad Guide - Load from SimBrief
See flyPad Guide - OFP on how to view the SimBrief Operational Flight Plan.
See Fuel and Weight on how to load fuel and payload.
Using the FMS (MCDU) and SimBrief Integration
Importing the SimBrief OFP to the FMS (MCDU)
We've included a quick method to have your SimBrief OFP automatically loaded into the MCDU.
Please do not select an arrival airport on the MSFS world menu, otherwise the integration will not work.
This portion of the guide assumes that you understand how to generate a SimBrief OFP. Otherwise, read the SimBrief User Guide first.
Please Enable Detailed Navlog SimBrief Setting
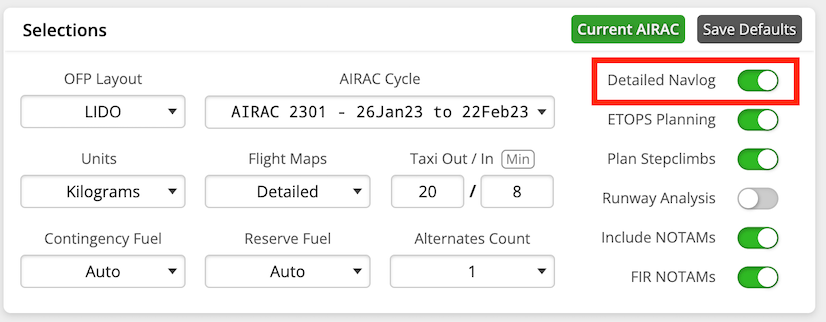
It is important when generating your SimBrief OFP to ensure that the Detailed Navlog setting is enabled.
This setting is available when generating a new dispatch. Additionally, we recommend that you save any of your preferred settings here, including Detailed Navlog as the default by clicking on Save Default. This ensures that this setting is never disabled when generating a new OFP.
If the setting is not enabled, the import function may only populate the departure and arrival airports into the flight page on the MCDU.
Request Data from SimBrief
- Return to
MCDU MENU - Click on
ATSU - Click on
AOC MENU - Click on
INIT/PRESS - Click on
INIT DATA REQ

This will prepare the MCDU to input the flight plan.
Initialize Flight Plan
IMPORTANT
Do not select an arrival airport on the MSFS world menu or flight planner. Doing this "initializes" the FROM/TO field when loading into your flight, removing the INIT REQ. option from the INIT A page.
Head over to the INIT A page.
- Select
INIT REQUESTby pressing LSK2R
This will load your flight plan from SimBrief directly into the MCDU

Note
RWY, SID, STAR, and APPR
The SimBrief import will not load RWY, SID, STAR, or APPR. You will need to manually add these into the flight plan. To learn how to set up the MCDU, you can read the FLIGHT PLAN section in our beginner's guide.
This is because RWY, SID, STAR and APPR are dependent on factors like active runways, traffic, weather, etc. and are determined by ATC and not the pilot's flight plan. They can be changed by ATC any time before takeoff or during flight and are therefore not imported in real life aircraft either.
Wind Request
Important Notes
The current implementation of wind requests in the A32NX is in its early stages, with a full accurate implementation to follow at a later date. This method provides an easy solution to quickly import winds from a valid SimBrief OFP.
In addition, please note the following:
- Per-waypoint entry and request of cruise winds is still being implemented.
- Wind Request functionality is not 100 % accurate to the real aircraft.
- In real life, selecting the wind requests option on the climb page would populate the wind data for all stages of flight.
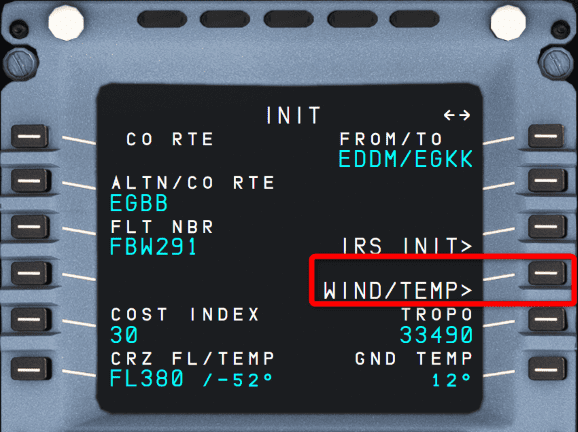
On the INIT A page, select WIND/TEMP by pressing LSK4R. This brings you to the CLIMB WIND page.
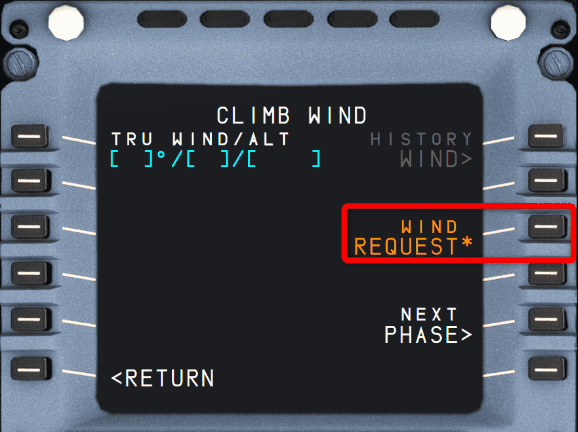
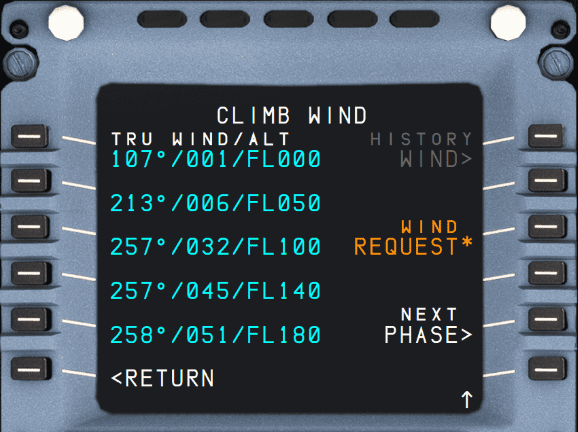
To request the wind data from the SimBrief flight plan, select WIND REQUEST by pressing LSK3R. This will calculate the wind profiles during the climb phase based on the SimBrief-provided wind data.
Press LSK5R to go to the NEXT PHASE, CRZ WIND. The same procedure of pressing LSK3R for WIND REQUEST applies here.
Finally, press LSK5R to go to the NEXT PHASE, DESCENT WIND. Pressing LSK3R for WIND REQUEST will calculate the wind profiles during the descent phase based on the SimBrief-provided wind data.
Manual Entry
If you are obtaining your wind data from another source, please note that the format is as follows:
Magnetic Heading / Wind Speed / Altitude
Examples are provided above, and please note that altitude is written in relation to flight level (FL).
Fuel and Weight
See Fuel and Weight