Approach and ILS Landing
This guide will explain the correct procedures to fly a final approach and conduct an ILS landing.
Disclaimer
The level of detail in this guide is meant to get a FlyByWire A320neo beginner currently on approach to intercept the ILS and land the aircraft safely on the runway.
A beginner is defined as someone familiar with flying a GA aircraft or different types of airliners. Aviation terminology and know-how is a requirement to fly any airliner, even in Microsoft Flight Simulator.
You will also find many great videos on YouTube on how to land the FlyByWire A32NX.
Check out the FlyByWire YouTube Channel as well: FlyByWire on YouTube
Prerequisites
The aircraft is on approach shortly before intercepting the ILS and is still in phase and state DES as per previous chapters.
Chapters / Phases
This guide will cover these phases:
- Intercepting the ILS Localizer
- Intercepting the ILS Glideslope
- Preparation and Checklist for Landing
- Landing
- Vacate Runway
1. Intercepting the ILS Localizer
Situation:
- Aircraft is in
DESphase. - Aircraft is set up for flight < 10 000 ft (
seat belt signson,landing lightson, etc.). - We are within the IAP (Instrument Approach) and either:
- at the altitude and speed from the chart (Final Approach Fix altitude and 250 knots if there are no other speed restrictions on the chart).
- or we are at a heading vector, altitude, and speed instructed by ATC.
At the end of the Instrument Approach, (or by ATC vectoring) we will be on a path to the Final Approach Fix and/or a path to intercept the ILS localizer and eventually the ILS glideslope.
As a last instruction from ATC Approach we are usually instructed to contact Tower ATC when fully established on the ILS localizer.
To intercept the ILS Localizer, we follow these steps:
-
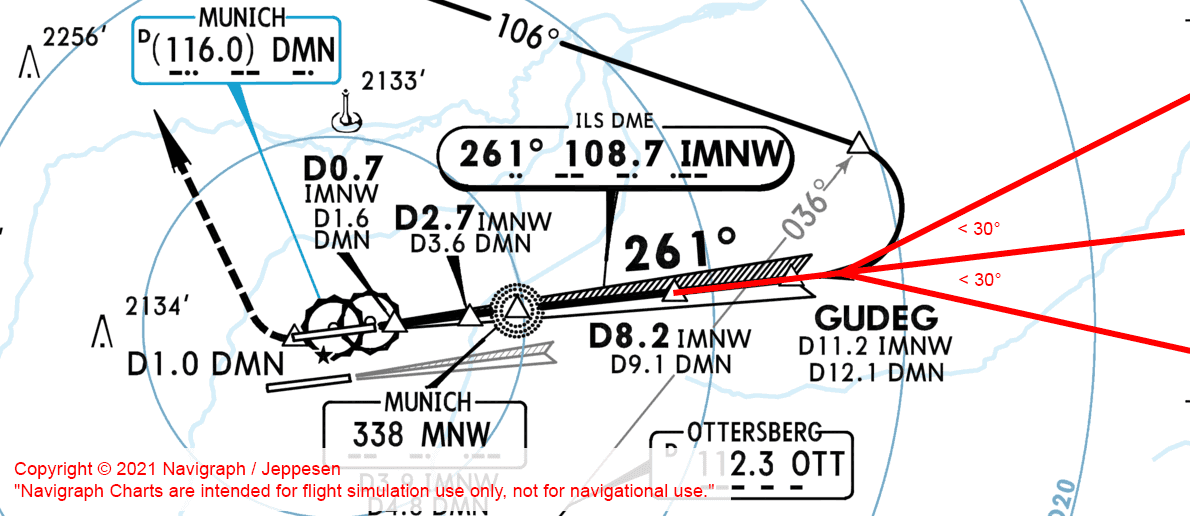
Verify that the correct ILS frequency is tuned in the
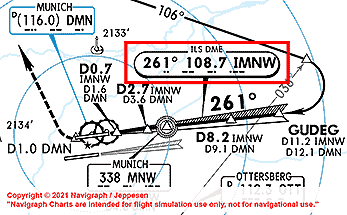
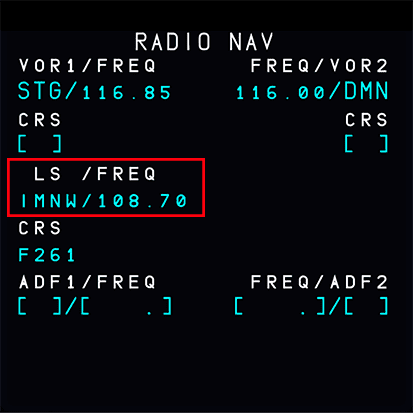
MCDU-RNAVpage. We find the correct frequency on the approach chart. -
Turn on the
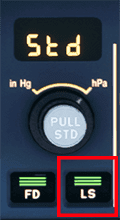
ILS localizer and glideslope scaleswith theLSbutton on the glareshield if not already done before. -
Make sure we are on the correct altitude (5000 ft in this example) and we should not have an approach angle larger than 30°.
-
Optional: Turn on
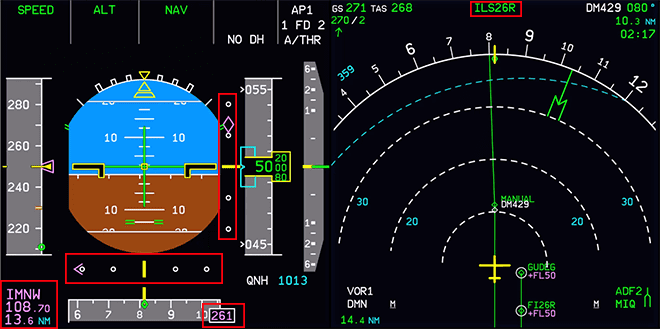
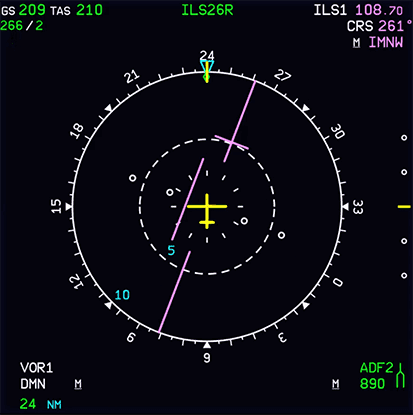
ROSE LS Modefor theND(can also be on F.O.'s side). The ROSE LS Mode shows the deviation from the localizer approach heading path. -
Activate the
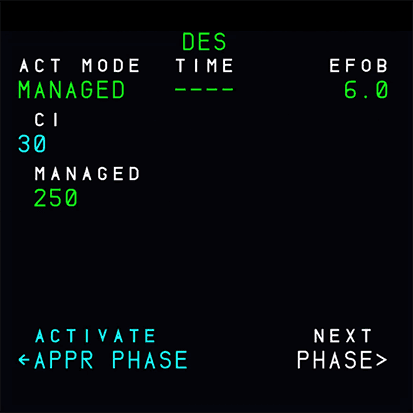
APPRphase in theMCDU-PERFpage. This is usually automatically done by the aircraft at a certain point during the approach, but we make sure that at this point at the latest it is activated. InAPPRphase, theAutopilottogether with "Managed Speed Mode" relieves the pilot of a lot of stress by managing the speed according to flaps setting automatically (S-Speed afterFLAPS 1, F-Speed afterFLAPS 2, Vapp after landing flap selection). -
Set
SPEEDtoManaged Speed Mode(push theSpeed Selector). The aircraft should now decelerate togreen dotspeed. -
Set
FLAPSto 1 at about VFE -15 knots (but never before speed is below VFE) for the first slat/flap configuration (CONF1). The aircraft will then decelerate further to prepare for the next flaps configuration. Our target is to be in CONF 1 and at S-speed by the time you need to set flaps 2 (CONFIG 2) before the glideslope intercept (S-speed will be slow enough to set flaps 2). -
Turn on
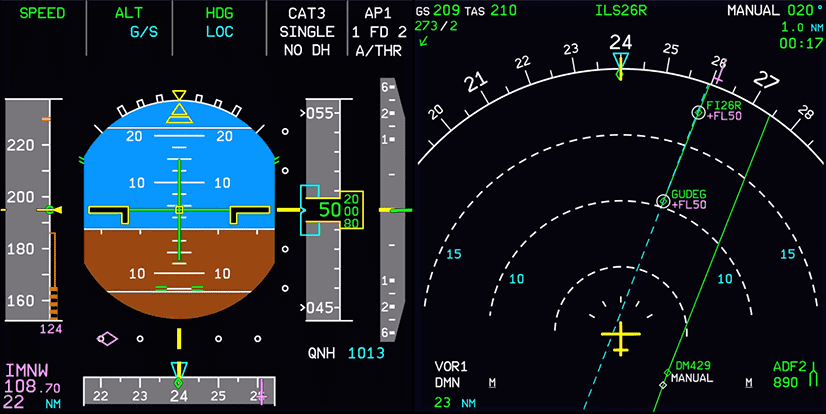
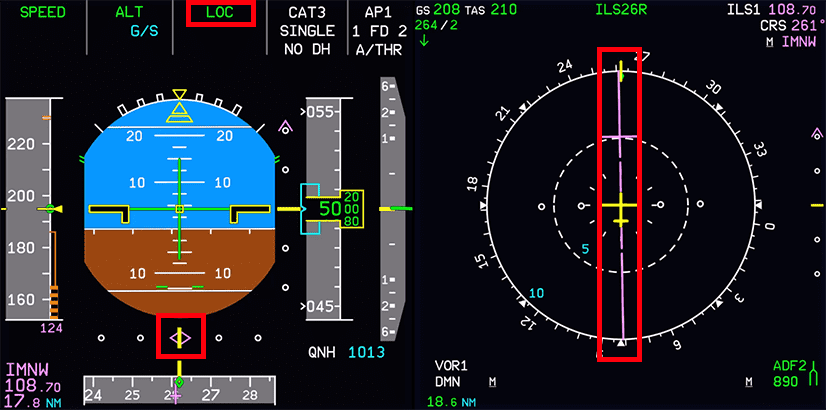
APPRin theFCUto command the aircraft to intercept the ILS localizer. The aircraft will keep the current heading until the localizer is captured and guides the aircraft towards the runway. Thelateral ILS localizer scaleshows thedeviation markermoving towards the middle of thelateral deviation scale. Also, the lateralFMAshowsLOCin blue (armed). Usually AP2 is turned on at this point to have a redundancy on the approach, for the sake of this guide you can leave it off.
What is the blue-dashed line?
You might ask what the blue dashed line is. It is part of the FIX INFO feature which allows drawing distance rings or radial lines from navigation fixes. For this illustration, it helps us to visualize the localizer signal path at 261° into the runway, which we are going to capture with the APPR mode.
Arming APPR
Using APPR also arms the glideslope descent (G/S) and the aircraft will descend as soon as it captures the ILS glideslope signal.
Do not descend without ATC clearance and only when directly on the ILS localizer path as only as obstacle clearance is guaranteed.
To help with this you can use the LOC button first (only localizer capture) and when cleared for approach press APPR
-
When we are established on the ILS localizer (the lateral
FMAshowsLOCin green) we will contact Tower ATC and report that we are established on the ILS localizer (including call sign and runway).
Tower ATC will then give us clearance for the ILS approach to the target runway. This clears us to descend on the ILS glideslope.
Do not descend without explicit clearance from ATC.
This concludes Intercepting the ILS Localizer
2. Intercepting the ILS Glideslope
Situation:
- Aircraft is in
APPRphase - Aircraft is established on ILS localizer
- Configuration is
CONF1at S-Speed (FLAPS 1)
After ATC has given us clearance for the ILS approach, we can also start descending using the ILS glideslope.
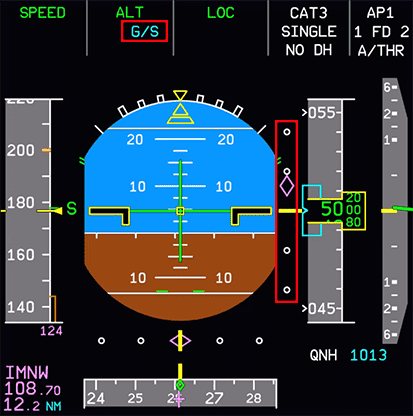
Check that the APPR button is activated on the FCU to arm the ILS glideslope descent mode.
The vertical FMA now shows G/S (glideslope) in blue.
This is a good time to set Flaps 2 (check that the speed is below the VFE for the next flap setting) as slowing down once we are descending along the glideslope can be difficult. We need the drag from the flaps if we want to avoid letting the gear down too early (which also would help us to slow down).
There is different guidance when to set FLAPS 2 at different airlines or Airbus. But for beginners, we recommend going to FLAPS 2 before starting the glideslope descent. Airbus guidance, for example, is FLAPS 2 during glideslope descent at about 2000 ft, which only works if speed is already reduced enough.
ATC instructed approach speed
The A320 Autothrust will manage speed during approach automatically and will reduce speed further with each flap setting. In real life and also when flying with Online ATC like VATSIM, we need to expect that ATC instructs us to stay at a certain speed (e.g., 160 knots until 5 NM to the runway). In this case, we would use Selected Speed Mode (select a speed in the FCU and pull the knob) until the instructed distance to the runway where we would then go back to Managed Speed Mode and drop the gear then as well as setting flaps to 3 and flaps to full - see below.
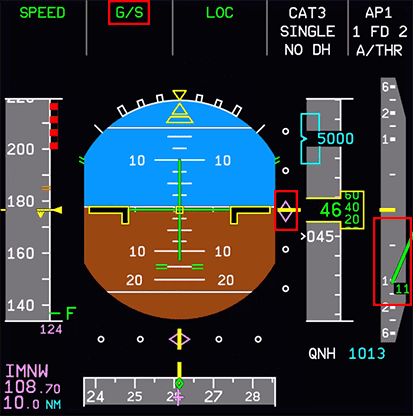
The aircraft will start descending when the deviation marker is in the middle (we have captured the ILS glideslope). The vertical FMA will now display G/S in green.
We are now descending along the glideslope. The radio altimeter comes alive at 2,500ft above the ground to display the actual precise height above ground.
This concludes Intercepting the ILS Glideslope
3. Preparation and Checklist for Landing
Situation:
- Aircraft is established on ILS localizer and glideslope
- Flaps are set to 2
At this point, we would prepare the aircraft for a possible missed approach and go-around by setting the go-around altitude in the FCU (see MISSED APPR procedure in the charts). We skip this for this beginner guide.
To set us up for the final approach we do the following steps:
Gear down: Sometime between 2,500ft and 1,500ft, typically around 5-6NM from the runway.- Turn on
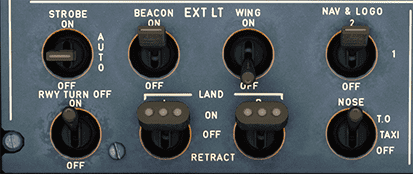
RWY TURN OFFlights and setNOSElight toT.O. - Set
FLAPS 3and shortly afterFLAPS FULL(always check speed before setting flaps. Otherwise, you might end up in an overspeed situation). - Going
FLAPS FULLwill reduce our speed to Vapp. - Arm
Autobrakes(Lowwhen dry,Medin rain or snow or a short runway).- If MAX manual braking is required, please see the section below - here.
- Arm
Speedbrakeby pulling up theSpeedbrakelever (Speedbrake must be retracted to arm).
We need to be fully set up and stable at 1,000ft above the ground.
Cabin Crew
In real life, the cabin crew will have been asked to prepare the cabin for landing during the descent. The exact moment and process might differ between airlines, but most seem to do this when the Seatbelt Signs are turned on during descent (typically at the latest at 10,000ft).
The Cabin Crew will notify the pilots either by a "Cabin Ready" button (A320neo) or by a call to the cockpit (A320ceo) once they are ready and strapped-in themselves.
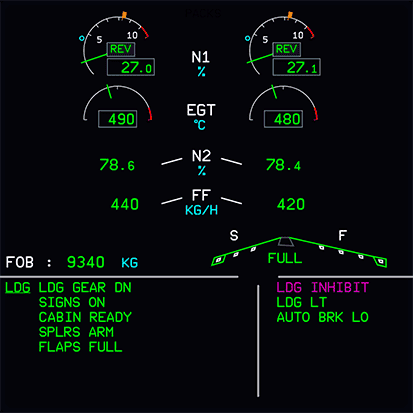
In the Microsoft Flight Simulator, we simulate this by pressing the CALLS ALL button on the left of the overhead panel. This will set the "Cabin Ready" status as shown in the ECAM and there will be a short announcement playing "Cabin Crew take your seats for landing".
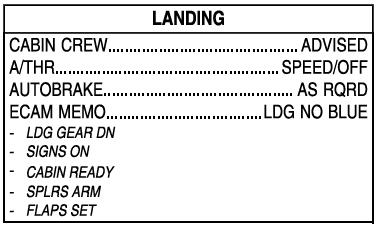
Complete the Landing Checklist
For the landing, we have our hand on the thrust levers for a potential go-around, so we can quickly push the levers forward into TO GA.
We do not move the levers until the last seconds before landing.
This concludes Preparation and Checklist for Landing
4. Landing
Situation:
- Aircraft is fully set up for landing as per previous chapters.
- Configuration is
FLAPS FULL. - Aircraft is at about 1000 ft above the ground.
- Wind is calm (no crosswind for this beginner guide).
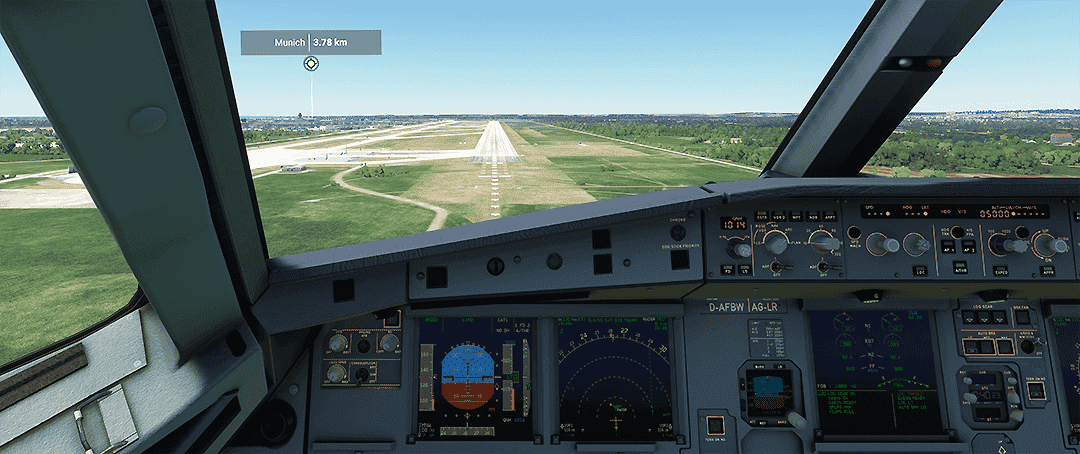
Although the A320 can do an automatic landing (Autoland) we will do a manual landing as this is more common and also more fun.
For an advanced guide on Autoland, see here.
We MUST get landing clearance from ATC before we actually are allowed to land. Without landing clearance, we must do a go-around (not part of this beginner guide) before touching the runway. Usually, ATC will have given us clearance at this point. Late clearance is rare and communicated to us beforehand.
Next, we turn the Autopilot OFF at about 500 ft above the ground by pressing the AP1 button on the FCU. We leave the Autothrust on, so we don't have to worry about thrust and speed at all (Leaving Autothrust on for landing is common for the Airbus).
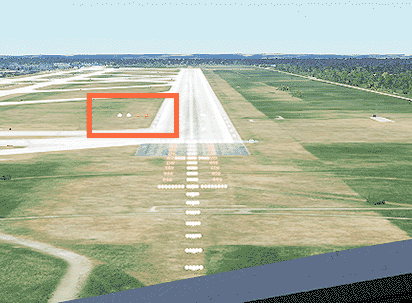
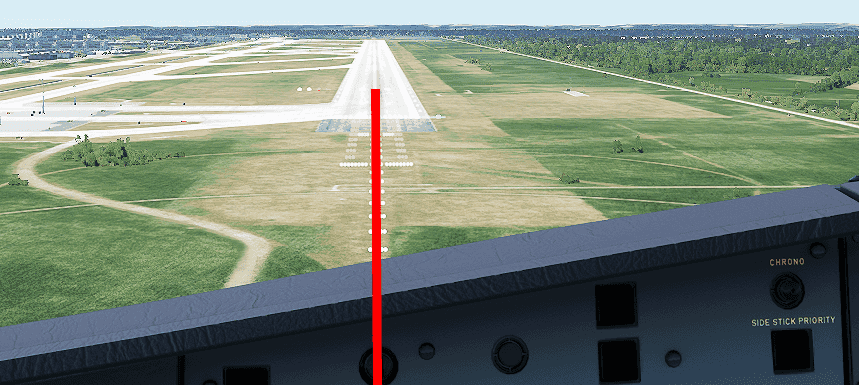
Now look out at the PAPIs which guide us vertically down to the correct touchdown point. We want two white lights and 2 red lights.
See also Wikipedia:PAPI
We correct our pitch only very carefully when too high (3 - 4 white) or too low (3 - 4 red). We don't need a lot of input to the sidestick to correct.
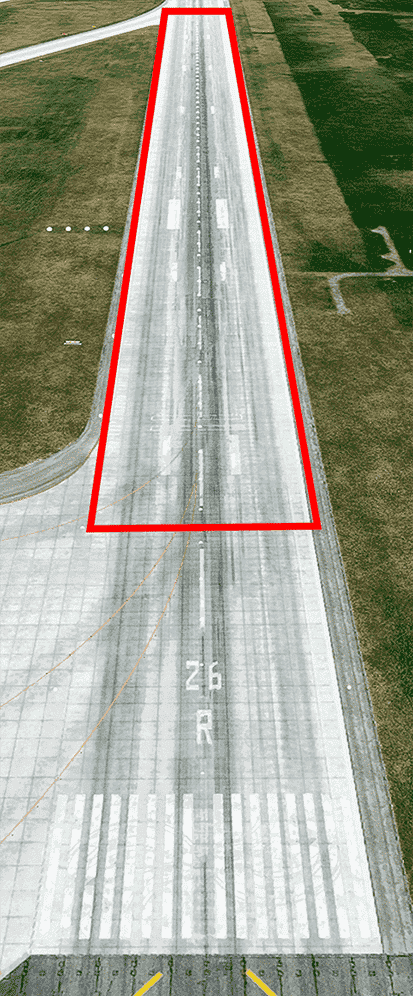
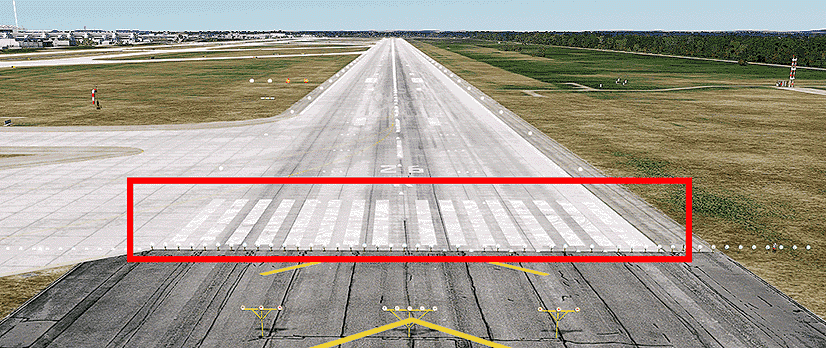
We aim for the middle of the touchdown zone, which is marked by the touchdown zone markers.
Also, we try to aim for the center line of the runway in a way that it points directly under us.
Correct your final heading and bank very carefully. We should not need to correct much at this point.
Crosswind landings
Crosswind landings are beyond the scope of this beginner guide. There are many good tutorials for crosswind landings in the A320 on YouTube.
Once over the runway threshold, we look towards the end of the runway to better judge our pitch, especially for the so-called Flare.
Flare
The flare follows the final approach phase and precedes the touchdown and roll-out phases of landing. In the flare, the nose of the plane is raised, slowing the descent rate and therefore, creating a softer touchdown, and the proper attitude is set for touchdown. [...] In the case of tricycle gear-equipped aircraft, the attitude is set to touchdown on the main (rear) landing gear. (source: Wikipedia: Landing flare)
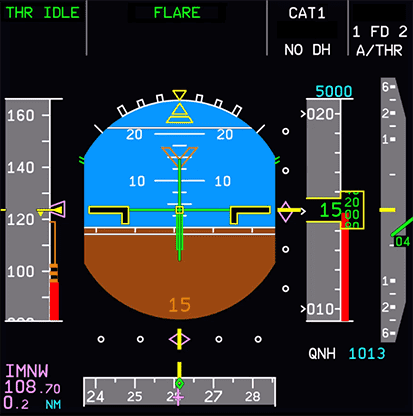
At the runway threshold we should be about 50ft above ground and prepare to set the thrust levers to idle and flare.
At about 30ft, we start our flare by pulling back on the sidestick carefully. We only need a few degrees in positive pitch and hold the aircraft there. Too much flare will cause the aircraft to float down the runway, too little will cause a harder landing.
At about 10-20ft, we pull back the thrust levers to idle (the aircraft also sounds the callout "retard retard ...") so that we are at idle thrust before we touch the ground.
We hold the attitude of the aircraft until it settles on the ground. Do not push the sidestick forward (nose down) once flared. We let the aircraft settle to the runway while holding the pitch.
Practice this!!
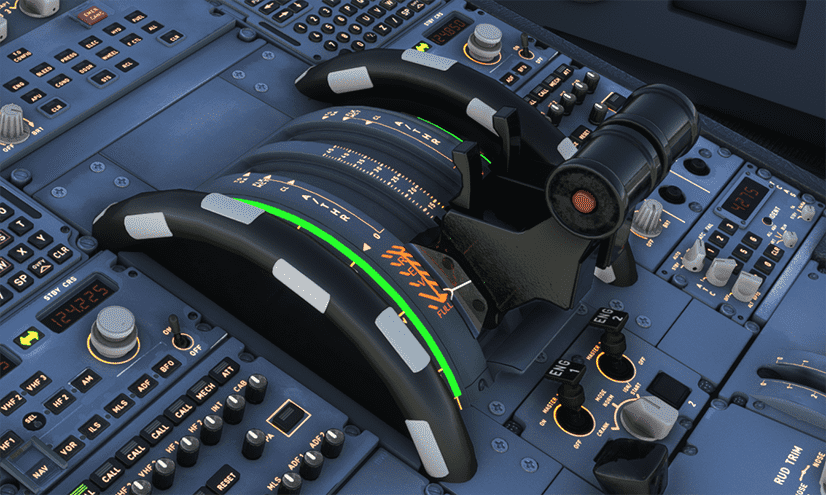
On touchdown of the main gear, the Speed Brakes will deploy automatically (we have armed them earlier) and we pull the thrust levers into the reverse position.
We let the front gear settle gently on the runway (don't slam it down) and hold the center line of the runway while we are reducing speed. The speed reduction should be monitored on the PFD speed band and the speed trend arrow.
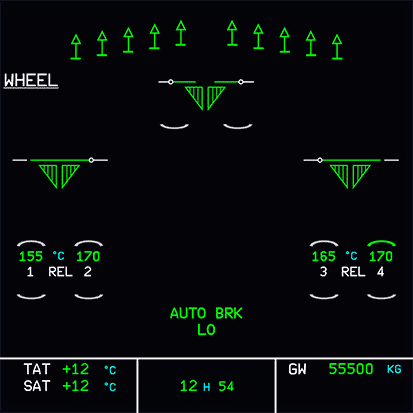
The Autobrakes should now have activated and started to further decelerate the aircraft. This can be checked by the Autobrake annunciators.
The upper ECAM should now show the engines in reverse mode (REV) and the lower ECAM shows the Speed Brakes (spoiler) deployed. Also, you should notice that the brakes actually get hotter.
At about 60 knots we put the thrust levers back to idle and at about 40 knots we release the Autobrakes by braking manually, which deactivates the Autobrake.
MAX Manual Braking Scenario
In a situation, where the pilot flying has established that MAX manual braking is to be performed, the following actions are required:
- Autobrake medium must be selected.
- Reverser MAX must be selected at touchdown.
- Pilot flying will override the autobrake on nosewheel touchdown and apply maximum braking pedal deflection.
This concludes Landing
5. Vacate Runway
Situation:
- Aircraft has landed and is still on the center line of the runway.
- Speed is < 40 knots.
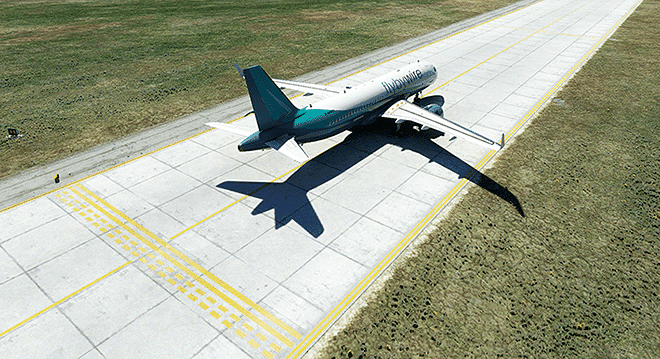
We look for the next runway exit and slow down to about 15 knots before we start turning off the runway.
We continue rolling forward until we passed the runway entry marker with the full length of our aircraft.
We can now safely stop the aircraft and do our "After Landing" checklist.
If ATC did not already contact us on the ground, we would contact them now to let them know we have vacated the runway. They will give us taxi instructions, so we can continue taxiing to our gate once we have completed the after landing tasks.
After landing tasks in simulation
In real life, the A320 will have two pilots which can actually do things in parallel. Talking to ATC, taxiing the aircraft and doing the after landing tasks. In the simulation we are typically alone, so it is perfectly fine to stop once we have fully vacated the runway and do these things one after the other. Talking to ATC and getting taxi instruction, do the after landing tasks and checklist, taxiing to gate.
This concludes Vacate Runway
Continue with After Landing Steps
